Showing posts with label wire wrapping. Show all posts

Thursday, April 16, 2015

Birthstone Gemstone Jewelry -- A Thoughtful Custom Made Gift

My friend Lesley had the brilliant idea to give her nanny a necklace and a pair of earrings using the nanny's birthstone and the gems of her awesome daughters.  Since then, I have been creating these lovely, thoughtful gifts for other beloved nannies!

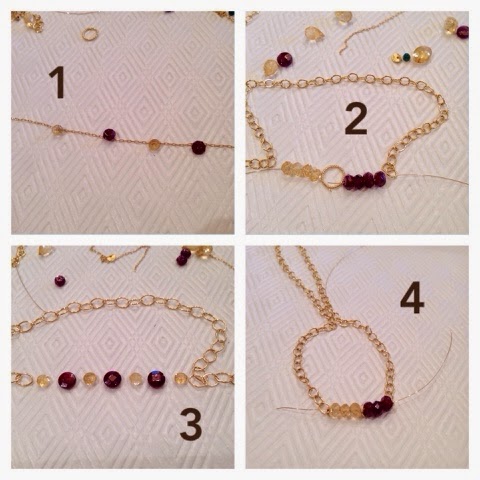
Here is one I made for a wonderful nanny with a May birthday that takes care of two girls with birthdays in November (citrine) and January (garnet.)


The process:
When I get the custom request, I lay out a variety of options.  This first photo below was ideas for the bracelet ideas. The second was for the necklace ideas. This customer combined some ideas together and we settled on the above.  She was super easy to work with too, which I think lends to a better finished product. Good happy vibes, good happy product.  Maybe?


She will be receiving her gift for her birthday in May. I hope she enjoys her one of a kind necklace and bracelet set that represents so much appreciation and love.


Amethyst Necklace Re-fashion -- One Gorgeous Piece Becomes Two

A friend of mine asked me shorten this beautiful amethyst necklace. 
How gorgeous! She thought it was a bit long and wanted the pendant to hang at about 18 inches.
Easy enough, just a little bit of wire wrapping and viola, a fix.

But what to do with the rest of the gorgeous amethyst left over? 
I took the left over pieces, added some citrine, a pearl pendant and gold chain and made this choker for her.


Here is a photo of the two new necklaces out of the original.


Here is a close up of the new necklace made from the left over amethyst chain.

Sunday, February 8, 2015

To pendant or to not to pendant....?

Pearls. I have noticed I've been drawn to large, odd shaped pearls lately and was talked into buying the last two strands of peachy pink tear drop shaped pearls at my last gem faire. They were gorgeous so why not? 

While visiting my mom, I made her this. 

Her pearl were more round and disk like. 
My next strand looked like this. 

This worked out because she likes round, I prefer irregular. To finish this guy, I added a pendant. 


Fancy close up, please:

Preference?


Tuesday, January 27, 2015

Today's Necklace--decisions, decisions

I need to make ten of the same necklace for a future press gifting event. I was playing around with some ideas and took these pic along the way. I wanted to use these pale blue jade beads I got at the San Diego bead faire. When I was adding the chain components, it looked very simple and sweet. 

I wanted the piece to have an edgier feel so I decided to add some pyrite in gunmetal to the other side. 

I could have left this just like a chain but I wanted to see what a pendant would look like. 

Hmmmmmm pearl? That always looks classic and elegant. But not too edgy. Pyrite??


I decided to go with the cool shaped pyrite bead stacked with a silver spacer and a silver toned pyrite. The finished necklace looks like this. Would you be happy to receive this as a gift? 


Saturday, January 10, 2015

Labradorite and Sapphire Earrings -- Dainty Didn't Sell...

These started small. I liked the idea of dainty earrings. Small, almost stud like but not exactly. Its also easier to wrap briolette style beads with the sapphires on top, I felt.  But maybe they were too small... Eventually I made them longer.

Once I made them longer, they sold! 

These big hoops needed to be made smaller, I think. 

These new updated earrings are available at my Etsy shop currently:
http://www.kuriyasunodesigns.etsy.com


Tuesday, January 6, 2015

A DIY Pearl Ring -- Easy Wire wrapped Pearl ring

A simple pearl ring can be worn with pretty much everything. Make one, make three. Different sizes, different stones, stack them for the current trendy look. 

How to make this ring:
Materials--
28 gauge wire (I used gold fill but any kind will do) about 2 feet 
A bead with a large hole (I used a pearl)

First I took the pearl and strung the wire through multiple times like so. 

I wrapped the wire through four times. 


I slipped the ring off of the plastic ring sizer. I started wrapping the long wire around and around. 


More wrapping -- I used my nails to tighten the coils along the way. 


Until I went completely around. Then viola! 

This was my very first "how to" post. I think I need to take photos more frequently during the process. I hope it was interesting none the less. 

You can also use 26 gauge wire, as long as it goes through the bead at least twice, maybe three times. 

Ring in the New Year with some Ring making!  (Couldn't help myself... I love a good, or terrible, word play)